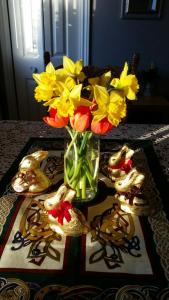
Beautiful Sunday morning… beautiful first day of spring. Very thankful for the good things in my life. Peace!
 nellyglass studio
Retired Stained Glass Artist
Beautiful Sunday morning… beautiful first day of spring. Very thankful for the good things in my life. Peace!
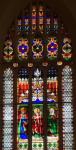
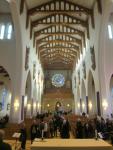
Today (Sunday March 6) Monica and I spent a wonderful afternoon listening to live Irish music uptown. The Cathedral of Immaculate Conception in Saint John is raising funds for restoration work and hosted an afternoon (free will donation) of local Irish musicians and dancers just in time to set the mood for St. Patrick’s Day. This church was built primarily by the Irish who emigrated to Canada between 1845-47 during the Great Famine. 30,000 people arrived during these three years, doubling the population of Saint John.
The weather was perfect for a walk so we did just that. Although a brisk day (- 1), the skies were clear and the fresh air was invigorating for the half hour it took us to go from the west side to the uptown church. Fortunately, we got there early enough to get some shots of the beautiful stained glass windows before the place filled with people. The music was excellent, of course, but it was the windows I wanted to see and so glad I did. After 25 years in this city, this was my first time in the cathedral. The restoration is coming along but still has a ways to go. Must return some day to see it again.
Here are some of the shots I got:









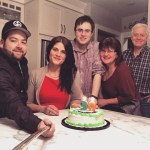
February is a wonderful month to have a baby son. Maybe that’s why I love fish so much … because of the Pisces thing. Ryan was born on this day, February 19th, in 1986 and turned 30 years OLD today. It was a spectacular day from start to finish as the photos will show. Happy Birthday, Ryan. We love you, you’re so old, practically ancient, like the ruins of Rome.




Love sushi especially when made at home 🙂 California rolls and meso soup with Casa Monica Shiraz. Happy Valentine’s Day Mon. A great day with you 🙂

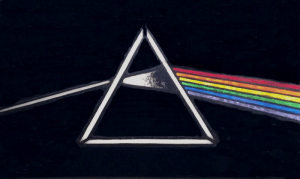
I just completed a fascinating project and one I can’t believe I haven’t done before now…although I’ve often thought about it. A small 6″x9″ sun catcher of “The Dark Side of the Moon”®. You can read all about it here and you can also find the page under the “Sun Catchers” menu.
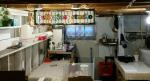
It’s Christmas Eve and I just finished my nellyglass studio sign project. What a wonderful journey I had through this project not only building the art piece but also blogging every step along the way.

The anticipation builds and builds as I work along many hours until that final moment when I hang it and get to step back and see it for the first time as it was meant to be displayed… in this case, lit from behind. This is the moment I can feel anything from amazed and delighted beyond my expectations to suddenly disappointed that something didn’t work quite as I had envisioned. Usually, I feel the entire range of emotions with every project. This one was the same. Emotions were fully engaged as I proudly hung my sign over my studio space in the basement. If I had to use one word, it felt real.
Now it’s time to set the glass aside to celebrate the birth of Christ with loved ones, exchange presents, be merrily foolish, and enjoy a grand gathering of several families to feast and rejoice. Blessed, are we not?
Thanks for coming on the journey with me through the various steps in the making of this special piece of art. Hope you learned something new and enjoyed the experience.
Nelly
Total time for this project: 43 hours
Immediately after the soldering is all finished, I spray the entire panel with Kwik Clean and rub it into every nook and cranny with a tooth brush. Then wipe off with clean dry rags (no water used for rinsing as it can react with the cleaner and turn white). Sometimes I repeat the cleaning process if heavy flux needs extra scrubbing but not this time. It cleaned up really easily.
Immediately following cleaning and drying is polishing for both sides. Special stained glass polish is rubbed all over the panel into every nook and cranny and allowed to dry. Once dry, it is buffed off with clean dry rags and out of every nook and cranny with q-tips; (quite time consuming with this project due to the many deep curves and points.
Total time cleaning and polishing : 2 hrs.


Next: Step 11 Installation
This step is just as often done before soldering especially in small panels like this. Nevertheless, to me it’s six of one, half a dozen of the other.
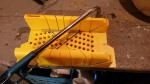
Regardless of when it’s done, a frame has to be cut. Zinc came comes in many sizes. This time I used a 5/16″ and cut all corners to 45° with my hack saw and mitre box.
Once cut, the frame is super easy to assemble with the panel previously soldered and ready. The came has a chanel on one side that fits over the edge of the glass. That’s why it was important not to solder the edges earlier. With frame in place and held tightly with pin I flux and solder each corner and join every solder line between each border piece (38 in total) to the frame. This many connections helps to strengthen everything. It is time consuming, though, doing the same thing to both sides (78 connections total). Finally I add hanging rings.
Total time framing: 2 hrs.
For this step, I assembled the panel directly on the pattern on a slab of drywall. That’s so I can pin down framing jig strips along the edges. They help to keep everything straight and parallel.
Once the first side is tack soldered together (avoiding all outer edges that will go into frame later), I take off the framing jig and flip over the panel and solder the backside (avoiding all outer edges). The backside is soldered better than just rough tacking. The beads are built up and kept smooth since I will see the backside all the time when I’m working at the bench).
Backside soldering done, I flip the panel back to front and solder to a smooth finish.
I soldered the entire panel first and then framed it after. (Sometimes I frame first and then solder… but not this time).
My soldering iron is a good one and keeps good heat at the tip during long runs. I like that it has a coil iron holder for when I need my hands elsewhere and that it has a temperature control dial so I can set it where I need it.
I tried to be careful and fussy and can feel my development progressing and am very pleased with the results. However, that super clean smooth solder bead with not one single ripple is still a work in progress for this student.
Total time soldering: 4 hrs.


Next: Step 8 Framing
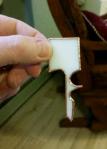
Normally I’ll have a panel reassembled before foiling unless space is an issue (as in this case). It’s quite a long panel and to have it assembled for foiling would mean using a 3 foot glass table base for the pattern and glass. My foiling space is preferably near the TV in the family room where, at the moment, the Christmas tree is taking precedence. Solution: foil the panel unassembled. Since each piece is unique and only goes in one place, assembly is easy. So, for foiling purposes, I’ll save space by bunching all the individual pieces together in small containers and just foiling away, enjoying Netflix Christmas movies, until all pieces are done. Then I can reassemble on the studio table for step 7.
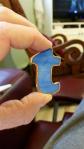
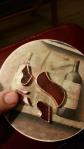
Foiling has to be my favorite steps in the process…I just love the slow careful finger work… its so relaxing… so long as my eyes and fingers continue to behave, I could foil forever. This project has some very deep curves including one drilled hole in the letter “g” which slows the process down but also extends the enjoyment time (happy face).
Total time foiling: 10 hrs total
Letters and border @3 hrs.
Background @ 7 hrs.



Next: Step 7 Soldering
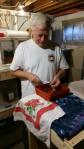
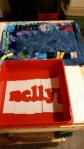
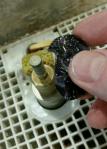
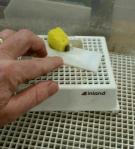
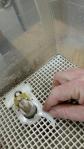
Now that the entire panel is fitting snugly, the next task is to wash every piece to get off all the grinder dust which can be stubborn like dried paste. Unless the edges of the glass are super clean, the copper foil won’t stick and that would be a big problem.
Happily, this is a short quick step in the process and a delightful one at that as you see the glass sparkle after a fresh washing.
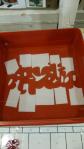
I like to wash and dry the entire panel in sequential order to make it quicker to reassemble before foiling and to prevent mixing up pieces that are nearly identical. However, with this project, each piece is unique from all the others (126 pieces total) so there’s no risk of mixing up pieces and therefore no need to reassemble the panel until after foiling. Nevertheless, I wash in sequence.
Total hours for washing = 1 hour.

Next: Step 6 Foiling
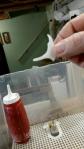
Before I can cut and fit the background pieces, I have to have the letters ground smooth and fitting in their place (then I can fit the background pieces accurately around the letters). So time to grind! 🙂
Three hours today and a little last evening had the letters fitting in place. Grinding is very much a “stand in one place and pay attention to what your fingers are doing” step (my fingernails are often mangled from getting too close). It’s also very therapeutic. The whir of the spinning motor and the hiss of the glass against the diamond bit drowns out most other sounds and allows your mind to go numb. I honestly can’t tell you what I think about during the grind but I completely enjoy the task so it must be something good.
Step 3 and 4 are often completed sequentially and in their entirety where all the cutting is done first and then all the grinding. Just as often, however, I go back and forth between steps 3 and 4 developing the parrern as individual pieces or larger sections are cut and ground right away… as in this case.
Enough for one day. We’re heading out to deliver and put up a Christmas tree for a dear old friend of ours in the city. She loves Christmas so much and we love seeing her giggle like a child when the lights are turned on. That always brings out the Christmas spirit.
Tomorrow, it’s back to step 3 again to cut out the background and then step 4 to grind it to fit.
Grinding time for this project: letters and border @ 3 hours and background @ 7 hours = 10 hrs total.



Next: Step 5 Washing
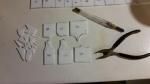
A very happy 4 hours spent cutting glass in my studio this morning. While Monica and our daughter, Sarah, baked Christmas cookies in the kitchen, I started on the rough cut of the letters for my “nellyglass studio” sign. The work felt important, positive and uplifting… who wouldn’t enjoy that? Part of the fun was choosing which colors for which letters to produce a harmonious but unpredictable flow of color across the piece. I love the artistry of free imagination. So many possibilities! And I love the sound of scratching glass with the carbide cutter and then the “snap” as you break the glass along the score line.
The cutting is not done yet. I’ve still got the background and the rest of the border to do. However, that’s for another day… right now it’s feet up to play with photos and record the journey so far… and maybe enjoy a Christmas cookie (or two). I’ll continue to add photos as the process continues.
Total tracing and cutting time for this project (letters and background)= 7 hours.




Next: Step 4 Grinding
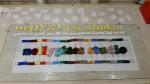
Up at 5:00 am picking through my inventory of project scraps to select 16 different colors for the studio sign. So many possibilities and most of them right choices… it’s a challenge to not continuously second guess yourself (which I can’t help doing a bit). By 7am, decisions were made and it’s on to step 3.
p.s. there’s always room for decision alterations early on in the process and I made a couple after this photo was taken.
Total time for glass selection = 2 hours.

Next: Step 3 Cutting
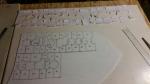
I’m working on an original pattern for “nellyglass studio”… this piece is 2ft x 0.5ft and will hang over my studio in the basement. The first 2 hours were spent playing with different fonts on the computer until I settled on “Cooper”. The next 3 hours were enjoyed designing the pattern and cutting out the tracing pieces. Amazing how 5 hours can fly by like that. Creative juice gives you lots of energy but makes you forget the time.
I find pattern creation to be the most creative of all the steps in producing a finished product. With original patterns especially, the connection to the piece runs deep. I’m already feeling it.
The template shown here is yellow but the finished product will be multi-colored. Hope to have it done in a few days… stay tuned.
Total time for pattern prep = 5 hours.

Next: Step 2 Glass selection
I have been having a ball in my studio. Since retiring in September, I’ve completed 5 projects and am ready to start #6 (a Christmas gift for someone close…shhh).
Included in these projects are my first two official nellyglass commissions…a 5 ft window transom for a friend and a set of miniature village houses for another friend.


What excellent practice I’m getting. I can see my technique improving steadily and that was my goal for the first year of retirement. This is perfect and I am blessed. Happy December everyone.
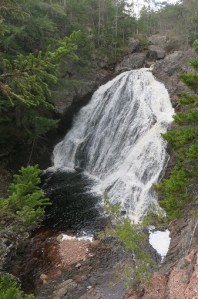
This was truly a great Sunday. First off, I played with stained glass in my shop for a couple of hours…how great a start is that! Next, as Monica is planning her Christmas decorations and in need of supplies, she and I went for a drive on the hunt for pine cones, birch twigs and fir boughs and just so happened along the way to enjoy visiting one of New Brunswick’s beautiful waterfalls, Welsford Falls. Spectacular.
In the afternoon Monica multi-tasked an incredible salmon, baked potato and veggies dinner as she surfed potential future adventures while I played with stained glass in my basement for a couple more hours. I’m on a little Christmas project…perhaps a gift for my wife (sneak peek below).
Ahhh Sunday, you treat us well. Thank you and see you next week.

Happily finished the mermaid panel project this weekend.

Still need to paint on her face and find hanging chain so not quite done yet but close enough to be able to post and share.

You can read the full story of her making and watch the slide show of pics from start to finish on the Mermaid page under Panels. I will add more pics when her face is finally added.
Seeing all that stained glass in Ireland and Scotland filled me with more than enough inspiration to keep me going. Next I’m going to learn how to fix broken glass panels (I have three to do…sounds like an interesting project).
It’s so good to be home after 18 days of travel and exploration, discovery and astonishment throughout Ireland and Scotland. I’d like to thank everyone who followed me and especially to those who commented with words of encouragement and support…some of you who I do not even know personally – you all were my motivation.
Inspiration is spilling over every time I go back and look at some of those amazing cathedral windows. The entire experience was too big for me to see as ‘one trip’ and I can still only piece it together with the help of my blog posts. I knew these would come in handy someday!
I’ve been in the studio ever since returning and imagining many things – things seen recently and future hopefully. My latest project is progressing well and I’m ready for the foiling stage…my favorite step in the journey because I get to sit back with my feet up … more like a lay than a step 🙂
Here’s a teaser:

The morning started foggy and cold but by 10:00 was full sunshine with clear blue skies (I think we’ve only had two days with rain since we arrived). We were on the streets early looking for a breakfast spot and found the perfect place at the i-café on Sauchiehall Street- really good pancakes and strong coffee…ready now for six hours of city walking.
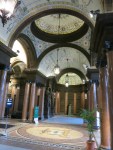
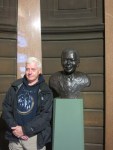
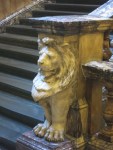
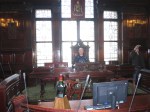
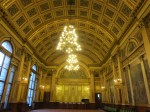
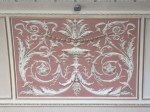
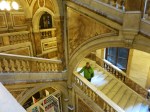
First stop, the Glasgow City Chambers at Royal Exchange Square. We timed it perfectly for the 10:30 free tour of this magnificent building with is four stories of Italian marble, gold leaf covered carvings, Wedgewood ceilings, mosaic tiled walls and painted murals. Dating back to 1889 and officially opened by Queen Victoria, it had a construction budget of 150,000 pounds but came in at more than 600,000 pounds and today would cost an estimated 40 million pounds. it is absolutely magnificent in every way. Best of all, admission and the tour is…free!
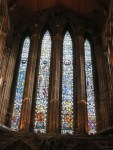
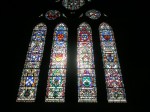
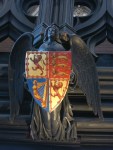
From there we made our way to Glasgow Cathedral in the north east of the city to view the magnificent windows. This cathedral, like many others we have visited, is a historic museum and also free to the public. This one in particular has fascinating catacombs under the cathedral filled with ancient treasures all well marked for a self-guided tour. Next to the cathedral, are the burial grounds called ‘The Necropolis’. High on a hill, one gets a sweeping panorama of Glasgow while enjoying centuries old monuments to the city’s famous and less-famous dead.
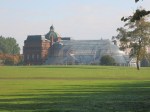
From the necropolis, we made our way south to Glasgow Green to see the People’s Palace, a one acre glass conservatory filled with plants and trees that the people of Glasgow can enjoy all year round. Also on site is a museum of the history of Glasgow, the Nelson Monument (love that) and the Doulton Fountain dedicated to the four continents that Great Britain colonized in the 1800’s, i.e. the British Commonwealth: Australia, India, South Africa and Canada.
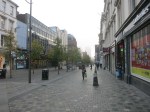
Time to start heading back toward our hotel, we strolled along the pedestrian-only shopping district of Argyle and Buchannan Streets (known as the Style Mile) passing notable landmarks like the Clock Tower and Central Station along the way. Thousands (mostly a young crowd) milled about on this very cosmopolitan part of the city. What good fun we had people watching while strolling along.
Dinner was terrific at ‘Thairiffic’ restaurant just a block from our hotel. And finally we retired to our room for a nightcap of Bushmills Whiskey (we had bought two drams a week ago on the Causeway Coast) which went wonderfully with Irish Whiskey Chocolate. That’s a perfect end to a perfect vacation. Tomorrow we are homeward bound for New Brunswick. Thanks everyone for coming along with us on this trip of a lifetime. Slán.